LED Headlight Installation Readiness Checker
Before you install your new LED bulbs, answer these questions to identify potential pitfalls. This tool helps you avoid common mistakes like flickering lights, improper beam patterns, and dust cover interference.
Detailed Findings:
Recommended Next Steps:
You just bought a shiny new set of LED headlights, and you’re ready to ditch those dim, yellowing halogen bulbs. It feels like a simple swap: pop the old one out, push the new one in, done. But if your lights are pointing at the stars or blinding oncoming traffic, you’ve likely hit one of the many pitfalls that turn a quick upgrade into a weekend headache. The truth is, yes, there is absolutely a wrong way to install them, and it’s not just about getting the bulb to light up.
Why Orientation Matters More Than You Think
Unlike traditional halogen bulbs, which emit light in all directions and rely on a reflector to shape the beam, LED chips are directional. They only shine forward. This means the physical orientation of the LED chip inside the housing dictates exactly where the light goes. If you install the bulb with the LEDs facing up and down instead of left and right, you’ll get a weird, uneven beam that leaves dark spots directly in front of your car. Most modern LED kits come with adjustable bases for this reason, but forgetting to lock the clip into the correct position is mistake number one.
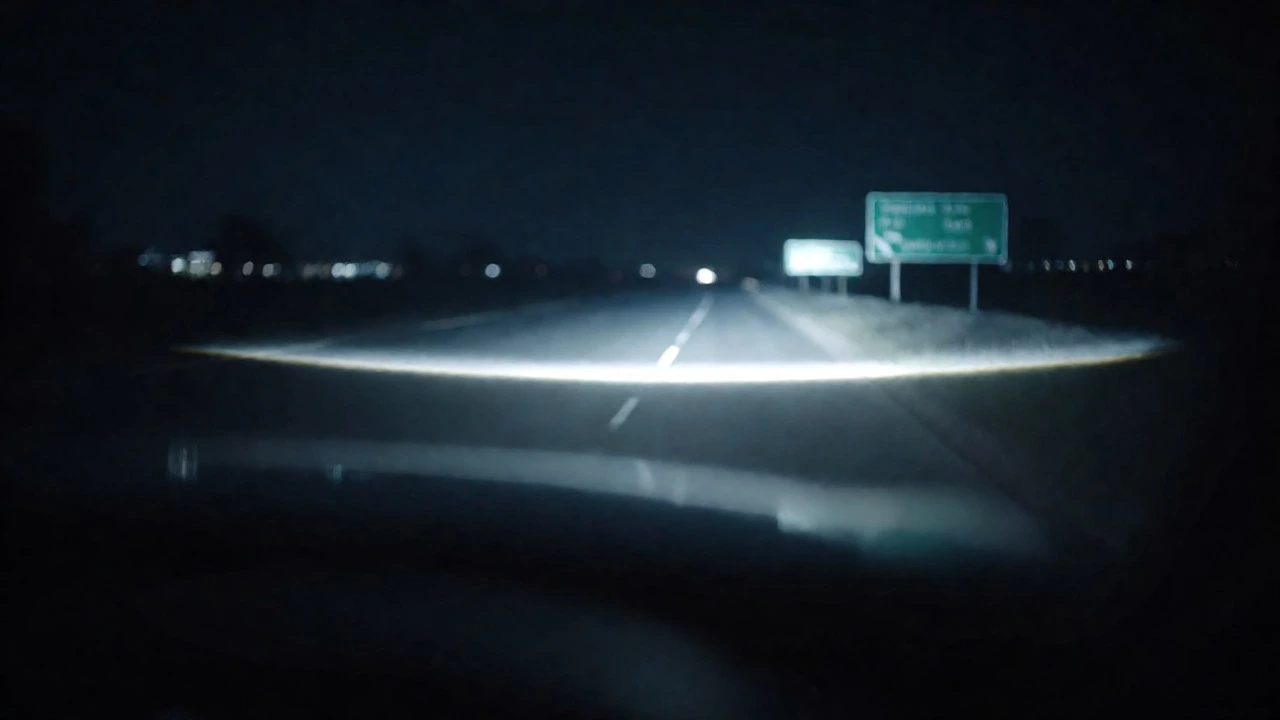
Think of it like aiming a flashlight. If you tilt it slightly, the spot moves drastically. In a headlight housing, even a few degrees of error can shift the cutoff line-the sharp edge between light and darkness-too high or too low. A high cutoff blinds other drivers; a low cutoff means you can’t see road signs until you’re right on top of them.
The Heat Sink Problem: Bigger Isn’t Always Better
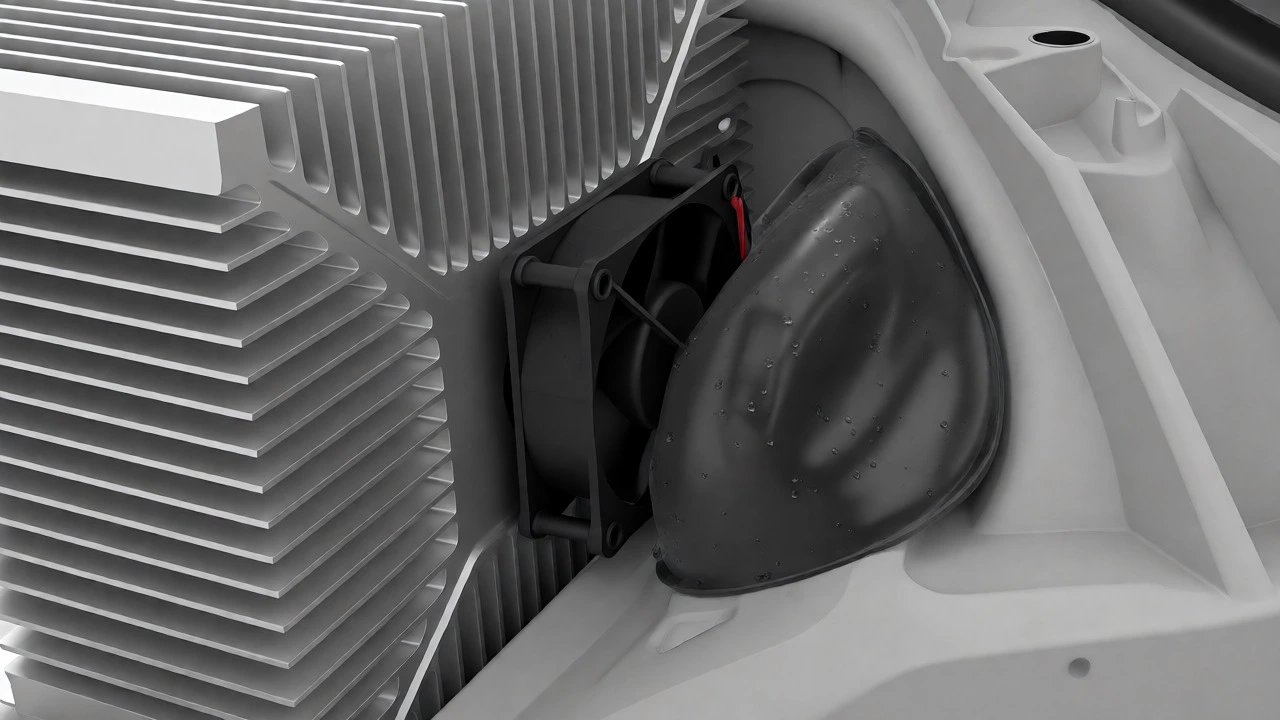
LEDs run cooler than halogens, but they still generate significant heat at the base, which needs to be dissipated by a heatsink or fan. Here’s where things get tricky: many factory headlight housings were designed specifically for the compact size of a halogen bulb. When you shove an LED bulb with a massive aluminum heatsink and a spinning fan into that tight space, you might find that the dust cover won’t close.
If you force the cover, you crack it, letting moisture and dirt into the assembly, which fogs up your lens from the inside. If you leave it off, you risk water damage during rain or car washes. Some manufacturers solve this with smaller fans or copper braids, but always check the physical dimensions before buying. Measure the depth of your current bulb and compare it to the spec sheet of the new LED kit. If the LED is longer than the original, you need a specific "low-profile" model or an extended dust cap.
| Issue | Cause | Solution |
|---|---|---|
| Flickering Lights | Insufficient power draw triggers vehicle safety check | Install load resistors or use Canbus-ready LEDs |
| Dust Cover Won't Close | Heatsink/fan assembly is too deep | Buy low-profile LEDs or extended caps |
| Poor Beam Pattern | LED chips oriented incorrectly (up/down vs left/right) | Rotate bulb to align chips horizontally |
| Error Messages | Vehicle detects lower wattage than halogen | Add decoder or resistor kit |
Dealing with CANbus Errors and Flickering
Modern cars, especially European models like BMW, Audi, and Mercedes, use a system called CANbus. This network monitors every electrical component in your car to ensure everything is working correctly. Halogen bulbs draw a lot of power, so the car expects a certain resistance. LEDs are efficient and draw much less power. To the car’s computer, it looks like a bulb has burned out, triggering a dashboard warning light or causing the LEDs to flicker rapidly as the system tries to restart the circuit.
You have two main options here. First, buy LEDs labeled "Canbus Ready" or "Error Free." These have built-in resistors to trick the car into thinking a standard bulb is installed. Second, if you already have non-Canbus LEDs, you can splice in external load resistors. Be careful with these-they get hot enough to melt plastic nearby, so mount them securely on metal, away from wiring harnesses and hoses.
Alignment Is Not Optional
Even if you install the perfect bulb with the correct orientation and no error codes, you haven’t finished the job. Your headlights must be aligned. Many people assume that because the bulb fits, the beam is correct. That’s false. The focal point of the LED must match the focal point of the reflector or projector lens. If it’s off, the beam will scatter.
To check alignment, park your car on level ground, 10 meters from a wall. Turn on your low beams. Mark the center height of each headlight on the wall. Then, mark the horizontal centerline of the beam pattern. For most cars, the top edge of the main beam should be slightly below the headlight center height, and the inner edges should converge slightly toward the center of the car. Use the adjustment screws on the back of the headlight assembly to tweak this. If you don’t do this, you’re either driving blind or annoying everyone else on the road.
Legal Compliance and Glare
In Australia, and indeed in most places, modifying lighting isn’t just about preference-it’s about law. Installing LEDs that produce a harsh, blue-white glare without proper shielding can lead to fines. More importantly, it creates a safety hazard. Poorly installed LEDs often lack the precise cutoff needed to keep light off the eyes of oncoming drivers.
Check your local regulations regarding color temperature. While 6000K (pure white) is popular, some regions prefer 4300K-5000K (slightly warmer) for better visibility in fog and rain. Also, ensure your LEDs are DOT-compliant or meet local standards. Just because a bulb fits doesn’t mean it’s street-legal. If your setup causes excessive glare, you may need to adjust the aim downward more aggressively than you think.
Troubleshooting Checklist
- Check Polarity: If the light doesn’t turn on, flip the bulb 180 degrees. LEDs are polarity-sensitive; reversing the connector often fixes this instantly.
- Inspect Connectors: Ensure the plug is fully seated. Loose connections cause intermittent lighting.
- Verify Fan Operation: Listen for the fan spinning. If it’s stuck, the bulb will overheat and fail prematurely.
- Test Both Sides: Sometimes one side works and the other doesn’t due to different wiring paths or fuse issues.
Final Thoughts on Doing It Right
Installing LED headlights is a fantastic upgrade for visibility and aesthetics, but it requires patience. Don’t rush the process. Take the time to orient the chips correctly, manage the heat sink space, handle any electronic quirks, and, crucially, align the beams. A well-installed LED kit transforms night driving, making it safer and more enjoyable. A poorly installed one is a nuisance to you and everyone around you. Do it right, and you’ll wonder why you didn’t switch sooner.
Do I need resistors for my LED headlights?
Not always. If your car is older or uses simpler electrical systems, you might not need them. However, modern vehicles with CANbus systems almost certainly require either built-in Canbus decoders within the LED bulb or external load resistors to prevent flickering and dashboard error messages.
Which direction should the LED chips face?
For most headlight housings, the LED chips should face left and right (horizontally), parallel to the ground. This mimics the filament orientation of a halogen bulb. Check your specific bulb instructions, as some designs vary, but horizontal alignment is the standard for optimal beam spread.
Why are my new LED headlights flickering?
Flickering is usually caused by the car’s computer detecting a change in power consumption. Since LEDs use less power than halogens, the system thinks a bulb is burnt out and cycles power to test it. Installing a Canbus decoder or load resistor stabilizes the voltage and stops the flicker.
Can I install LED headlights myself?
Yes, most swaps are DIY-friendly. You typically need screwdrivers, pliers, and maybe a socket wrench. However, access varies wildly by car model. On some vehicles, you can reach the bulb from behind the wheel well; on others, you might need to remove the battery or headlight assembly entirely.
Are LED headlights legal everywhere?
Laws vary by region. Generally, aftermarket LEDs must meet specific brightness and color standards. In Australia, they must comply with Australian Design Rules (ADR). Ensure your bulbs are certified and that the beam pattern is properly aligned to avoid fines for glare or improper lighting.